Onions are one of the most widely cultivated and consumed vegetables in the world, prized for their unique flavor and versatility in cooking. They can be grown in a variety of climates and soil types, making them a popular crop for both commercial and small-scale farmers.
Onions (Allium cepa L.) are typically grown as annual herbs from bulbs or seeds, usually planted after rice. As one of the most essential ingredients in many cuisines worldwide, onions are also known for their ability to suppress blood sugar levels and platelet aggregation.
In the Philippines, the most commonly cultivated onion varieties include Red Creole (red onion), Yellow Granex (white onion), and shallot (multiplier onion). Recently, native onion cultivars such as Tanduyong and Batanes are gaining popularity for export purposes.
This guide will cover the key aspects of onion production, including soil preparation, planting techniques, fertilization, irrigation, pest and disease management, and harvesting. By following these guidelines, you can ensure a successful onion crop with high yields and quality produce.
Whether you are an experienced farmer looking to expand your crop range or a beginner interested in learning more about vegetable cultivation, this guide will provide you with valuable insights and practical tips for growing onions.
Red and white onion
Multiplier Onion
Soil and Agroclimatic Factors
Places with distinct wet and dry seasons are suitable for commercial onion production. Onion grows best in mild climate and dry and warm conditions for proper maturation of bulbs. Well- drained, sandy, and silty loam that are friable, fertile, and able to maintain adequate moisture are favorable to onion-growing.
Seedbed Preparation
Seedbed for onion is from 50-70 cm wide, elevated, and of any convenient length.
2. Plow the seedbed area as deep as possible and harrow several times. Seedbeds should be parallel to each other at a distance of 30 cm. To raise the seedbed 10-15 cm high, excavate the soil in the proposed pathways, and put it on the seedbed.
3. Pulverize the topsoil 3-5 cm deep and then level the surface. The seeds are planted at 1-1.5 cm deep.
4. Minimize weed problems by irrigating the area after harrowing to allow weed seeds to germinate. A week after they germinate, plow and harrow again, repeatedly before sowing.
Sowing
1. Make shallow furrows horizontally across the seedbed with 2-5 cm spacing in between.
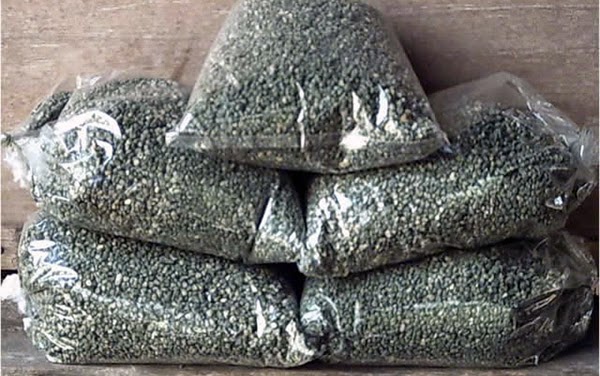
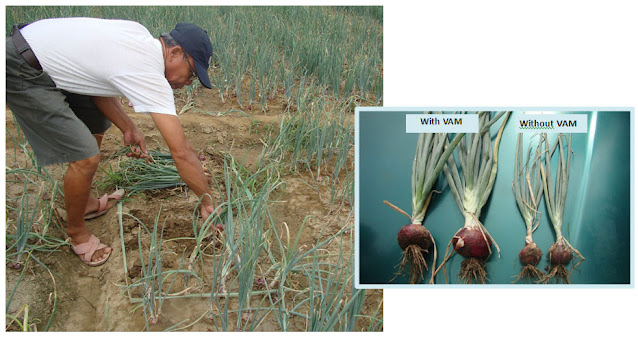
2. Apply Vesicular Arbuscular Mycorrhizae (VAM), a biofertilizer that helps in water and nutrient absorption, and prevention of soil- borne diseases.
3. Sow 200-250 seeds per 5 m of furrow at a depth twice the seed size.
4. Cover the seeds with well-pulverized soil and top them with rice straw or hull mulch.
5. Water the seedbed thoroughly using 10-15g Trichoderma spores, a fungus that helps minimize incidence of soil-borne diseases like damping-off, mixed in 16 L water.
6. Bulblets are planted in the seedbed 2-3 cm apart within a row and 3-5 cm apart another row. About 200-300 kg of good bulblets are needed per ha.
Trichoderma
Care of Seedlings
Weed and fertilize with 10 tbsp 14-14-14 or 16-20-0 dissolved in 16L of water 2-3 weeks after germination. Reduce frequency of watering ten days before transplanting. Allow seeds to suffer from mild wilting before watering to harden the seedlings. Water the seedbed thoroughly an hour before pulling them gently avoiding damage to roots or stems for transplanting.
Land Preparation
 Land preparation should be started after sowing seeds in the seedbed. It can be done by zero or minimum tillage with rice straw mulching or conventional tillage.
 Zero tillage requires rice stubbles and weeds to be mowed as close to the ground as possible and application of a non-selective herbicide. Plowing two and harrowing twice or thrice may be done instead of herbicide application in minimum tillage. Broadcast 45 g of 14-14-14 fertilizer. Spread mulch 5-10 cm thick throughout the field.
In conventional tillage, field is plowed once or twice and harrowed twice or thrice every 2-3 weeks until transplanting. Irrigate field after harrowing to allow weeds to grow and be removed in the next harrowing.
For final land preparation, plow the area once and harrow it several times then level it. Rows of narrow, shallow furrows are made parallel to each other 10-15 cm apart. Apply 14-14-14 in the furrow at the rate of 100g per linear meter. Cover the fertilizer with fine soil
Planting or Transplanting
1. Before transplanting, dip the seedling roots in a mixture of Trichoderma.
2. Soil is pressed for better contact between soil and roots. In direct seeding, 3-5 seeds are planted per hill at 6-8 cm planting distance between hills in the furrow.
3. Apply VAM or Trichoderma before seeding.
4. Cover seeds with soil.
Irrigation/Watering
1. Water immediately after planting. In unmulched plots, watering is done everyday in the morning to prevent damping-off especially during the early stages of vegetative growth. For mulched plots, water every 5-7 days or when temporary wilting occurs.
2. Stop watering 10 days before harvest.
Fertilizer Application
VAM application
1. One to two weeks after planting, apply (either broadcast or dissolved in water and sprinkled) 15g of urea and 10g muriate of potash per square meter or 150 kg and 100kg, respectively, per hectare.
2. Repeat application when bulbs start to develop. Too much fertilizer may result in over- sized bulbs. For direct-seeded, fertilize one month after germination, and when bulbs start to develop.
Harvesting
Harvest onions when necks soften, leaves change from green to yellow, roots die, and fall over. Selective harvesting is suggested to avoid rapid deterioration of immature bulbs, which may in turn cause deterioration of older, more mature bulbs.
Source:
Integrated Pest Management in Rice-Vegetable Cropping Systems.
Maligaya, Science City of Muñoz, Nueva Ecija. PhilRice.


2 Comments